Pages

Showing posts with label Crafts. Show all posts

Tuesday, February 1, 2011

Who doesn't love hair bows?

So a while back I saw a how to blog on Korker Bows & it looks so easy I had to try it! The blogger said she used 1/4 inch ribbon but I decided that was smaller than that I wanted. So I went with 3/8 and I liked how it turned out :)  Not to say that I won't make some smaller ones for babies/toddlers in the future now that I know how easy they really are to make!

I gathered my supplies
Ribbon
Lighter (to seal the ends of the ribbon)
Scissors 
Wire
Wire cutters (needle nose pliers saved me a trip to the store)
and 1/4in dowel rod (cut in half to fit in my oven)
   TIME FOR SOME FUN :D


 So I uncurled some of the ribbon from the roll, laid it on the counter and this is what it did! It made me laugh.


I wrapped the rod in ribbon, maybe it was a little bit closer together than I should have... it worked, but next time I'll leave more space.


Baking time! 20 minutes at 275 degrees... perfections!


Letting them cool off & fully set to keep their shape.


After I uncurled the ribbon from the rod I cut them down (in half, in half again etc) till they were the size I wanted.


For this bow I sewed the ribbon together, tied it to the clip and then hot glued it all together. It worked pretty well.


This bow I did pink and red (you can't tell in the picture) with a white button in the middle.


And this one I did for my niece Chandler- She wanted Gold & Red (her school colors). I hope she likes it! I'll post a picture of Chandler with the bow once I mail it to her. Man I wish that girl lived closer to me :(
For this bow stacked the ribbon curls and tied them with a string (so it could be tied tight) then I folded a piece of gold ribbon in half and covered the string. I then tied it onto the clip and hot glued it in a few places so it will hopefully stay put.

All the bows got a coat of Aqua Net to help them keep their shape and with that they are ready to be worn.

 I gave the first two bows I made to my other niece Isabella & she loved them. The other day she asked her mom for "Bows names is Aunt Kimber made for me" :)

I have plenty of ribbon left so I'll be making a bunch more bows! It's a good thing I have friends having babies!!

Thursday, January 20, 2011

Hot Chocolate On a Stick?!?!

So I came across a blog called Givers Log that had an amazing recipe for hot chocolate on a stick! I know what your thinking- how in the world does that work??  I thought the same thing. I let my curiosity get the best of me and I just had to check it out.   The basic idea is to melt baking chocolate then add cocoa, powered sugar, and a pinch of salt, put it in a mold, add a stick and boom- hot chocolate on a stick! Ok, so it's a little more involved than just adding things together but it didn't seem *that* hard to make!

AmberLee, the author of Givers Log , does an amazing tutorial on how its made and even has great tips for picking the right chocolate! After reading over her post several times, I headed off to HEB (the best grocery store ever) to find baking chocolate. It was completely overwhelming to pick the right chocolate so I just went with the Ghirardelli baking chocolate. I knew it would be good and HEB had it on sale, how could I say no?? Now it was time to have some fun :)
 
I had everything I needed....
8oz baking chocolate (I used both milk and semi sweet chocolate)
1/4 cup cocoa (regular and special dark depending on what I felt like for that batch)
1/2 cup confectioner’s sugar
Pinch of salt (I think I forgot to add this to a few batches... oops!) 
Ice cube tray (thanks Target $1 spot)
Candy sticks
Marshmellows
and sprinkles


Now the fun could begins! I sifted the coco, powered sugar and salt (if I remembered) together and set aside.


Then I broke up the chocolate (to help it melt faster) and melted it on a double boiler.


 Starting to melt :)


Once it was all melted I added the coco/powdered sugar mix.
After reading quite a few of the tips at the bottom of the blog I figured out a few things:
  1. If I put the bowl back on the double boiler for a few seconds it helped everything mix easier (being careful to not over heat & scorch the chocolate).
  2.  I didn't want to find out exactly what happened if water got into the mix so I heeded the "keep water out" warning.
  3. When AmberLee says it gets thick like frosting she wasn't kidding!


 Now it's all mixed up and ready to be molded!!
 I tried using her zip lock bag method and made a huge mess :( So I opted for plan b:  use spoon to put the chocolate in the tray. It was still a little messy so there are no pictures of that part.


Once the cubes were filled (1 batch makes 10-12 cubes) I tapped the tray on the counter to make sure there weren't any air bubbles. Then I added the sticks and some marshmallows and put them in the freezer to set.  I was a little over eager and didn't realize how long they would take to set.  I had some trouble getting the chocolate out of the mold :( I messed a few up and had to reshape and put them back in the freezer. Once I decided I would be patient and let them fully harden they popped right out like ice cubes. YAY!


 I wasn't quite ready to bag them up so I made a makeshift holder- empty egg carton turned upside down with holes poked in it. Genius, I know ;)


After making at least 5 batches I was finally done and was ready to wrap them up.


All bagged and ready for ribbon!


So much fun to make!


I was kind of proud of myself with this packaging. I had decided to sub out the powered sugar for powered peppermint mocha creamer (I used the milk chocolate bars for these so it would be sweet enough)  in one of the batches. Not to brag but it was really good! I wanted to distinguish the peppermint mocha ones from the others so I added a mini candy cane to the bag. I also added a tag that said to mix each cube with 3/4 to 1cup of hot milk, cream or water.
When I made a cup for me I used a milk/cream mix :D
I didn't try all the recipe variations before I gave them away so I'm hoping they were good... Next time I'm going to try different flavored creamers and see how they turn out. I can't wait!

Wednesday, January 19, 2011

A gift for a friend

I needed a birthday gift for a friend but nothing I found was right. Her birthday came and went and I STILL didn't have her gift (I'm kind of a bad friend). I decided to make her something but then couldn't decide what to make. One day I realized I should make her an ornament! I decided to etch butterflies onto one of my glass ornaments and then put butterfly cutouts inside it. Now that I knew what I was gonna make I couldn't wait to get started.

I used my sisters cricut to cut out small butterflies and stuck them all over the ornament.
I applied the etching cream and let is set about 5-7 minutes. The glass is thin so it didn't need long.
Then I got to the hard part- cutting out all the butterflies to put inside. I have a butterfly punch but it's for doing corners of paper. So I had to get creative to them them all cut.

I decided to cut strips of construction paper and stack them 6 pages thick. But 6 butterflies at a time isn't much when you're trying to fill an ornament.


  I got it filled to here and decided that is looked cute and stopped cutting out butterflies.


They looked cute all stacked in the ornament :)


I added some ribbon and it was done!

Tuesday, January 18, 2011

Ornaments round 2

Back at Easter my sister found a new egg decorating idea in Martha Stewart's magazine. We used electrical tape as a "stencil" that you can move around to make different patters while dying the eggs. When I was trying to decide what to do with the 2 5/8" glass ornaments I remembered the egg thing and decided to try it for etching the ornaments. I also tried using hole reinforcements so get perfect circles.  Both worked like a charm! The electrical tape wrapped around the ornament fairly easy, I just had to make sure all the edges were sealed. Since I cut the tape to make it smaller it made a cool wavy effect to the etching.


 I added glitter to some, left some plain, and filled a few with random things like tinsel and hot chocolate (I got a simple hot chocolate recipe from my sister). So much fun to make and give away!

Monday, January 17, 2011

Christmas Ornaments

I love Christmas decorations! The lights on all the houses, trees decorated with childhood ornaments, the smell of baked good! What's not to love?  This year I got inspired and decided to try my hand at making ornaments. I think they turned out pretty cute :)
I had seen a blogs about marbleized ornaments but it seemed like a time consuming process and I'm not always that patient. I asked Julie about them and she said I could use rubbing alcohol to "speedup" the process. So I headed to my favorite craft store Hobby Lobby for some half off ornaments.   This was an easy and cheap project that I couldn't pass up!
All I need was:
Glass ornaments (I got 1 3/8" ornaments)
2 (or more) colors of acrylic paint
Rubbing Alcohol (I put some in a small bottle with an eye dropper on it)


 I remove the tops and ran the ornaments through some warm soapy water to get any dust or glass particles off. They are fairly delicate so I had to be pretty gentle with them.

Once they were dry I dropped four strips of color in them (ie two green and two red). I used just enough to make a line from the top to the bottom of the ornament. I forgot to take pictures of that part... oops!  Once I had my four lines of color I added a few drops of alcohol and swirled it around. Then I got impatient, covered the opening of the ornament with my finger and shook it like crazy.  I learned a few things during that process.
1) Sometimes you need a little more paint than you first up in there
2) Sometimes you use to much paint and have to turn the ornament upside down in your dish drainer (with newspaper under the drainer to catch the paint) to get rid of the excess.
3) Sometimes you use to much alcohol and get a cool crackle effect 
Despite those lessons I think the ornaments turned out pretty cute! Once they fully dried I replaced the tops and then had to decide what I wanted to do with them. I wasn't sure if I wanted to add ribbon and hang them on my tree or use them as decorations on Christmas gifts. 

See how cute they are! I eventually decided use them as gift decorations and they were a hit. Wonder what I'll do with them next year.....

Sunday, January 16, 2011

Painting made easier

One day I was going through One Pretty Thing and I came across a blog where a lady used a stencil transfer to paint words on the walls of her house. I live in an apartment so painting on the walls isn't an option but I has a canvas I had wanted to paint but wasn't sure what to paint. Now I'm not much of a artist and I can't draw a straight line to save myself, but after seeing HomeSpunThreads blog I decided to try her technique. I figured if it didn't turn out I could always paint over it and try something else.

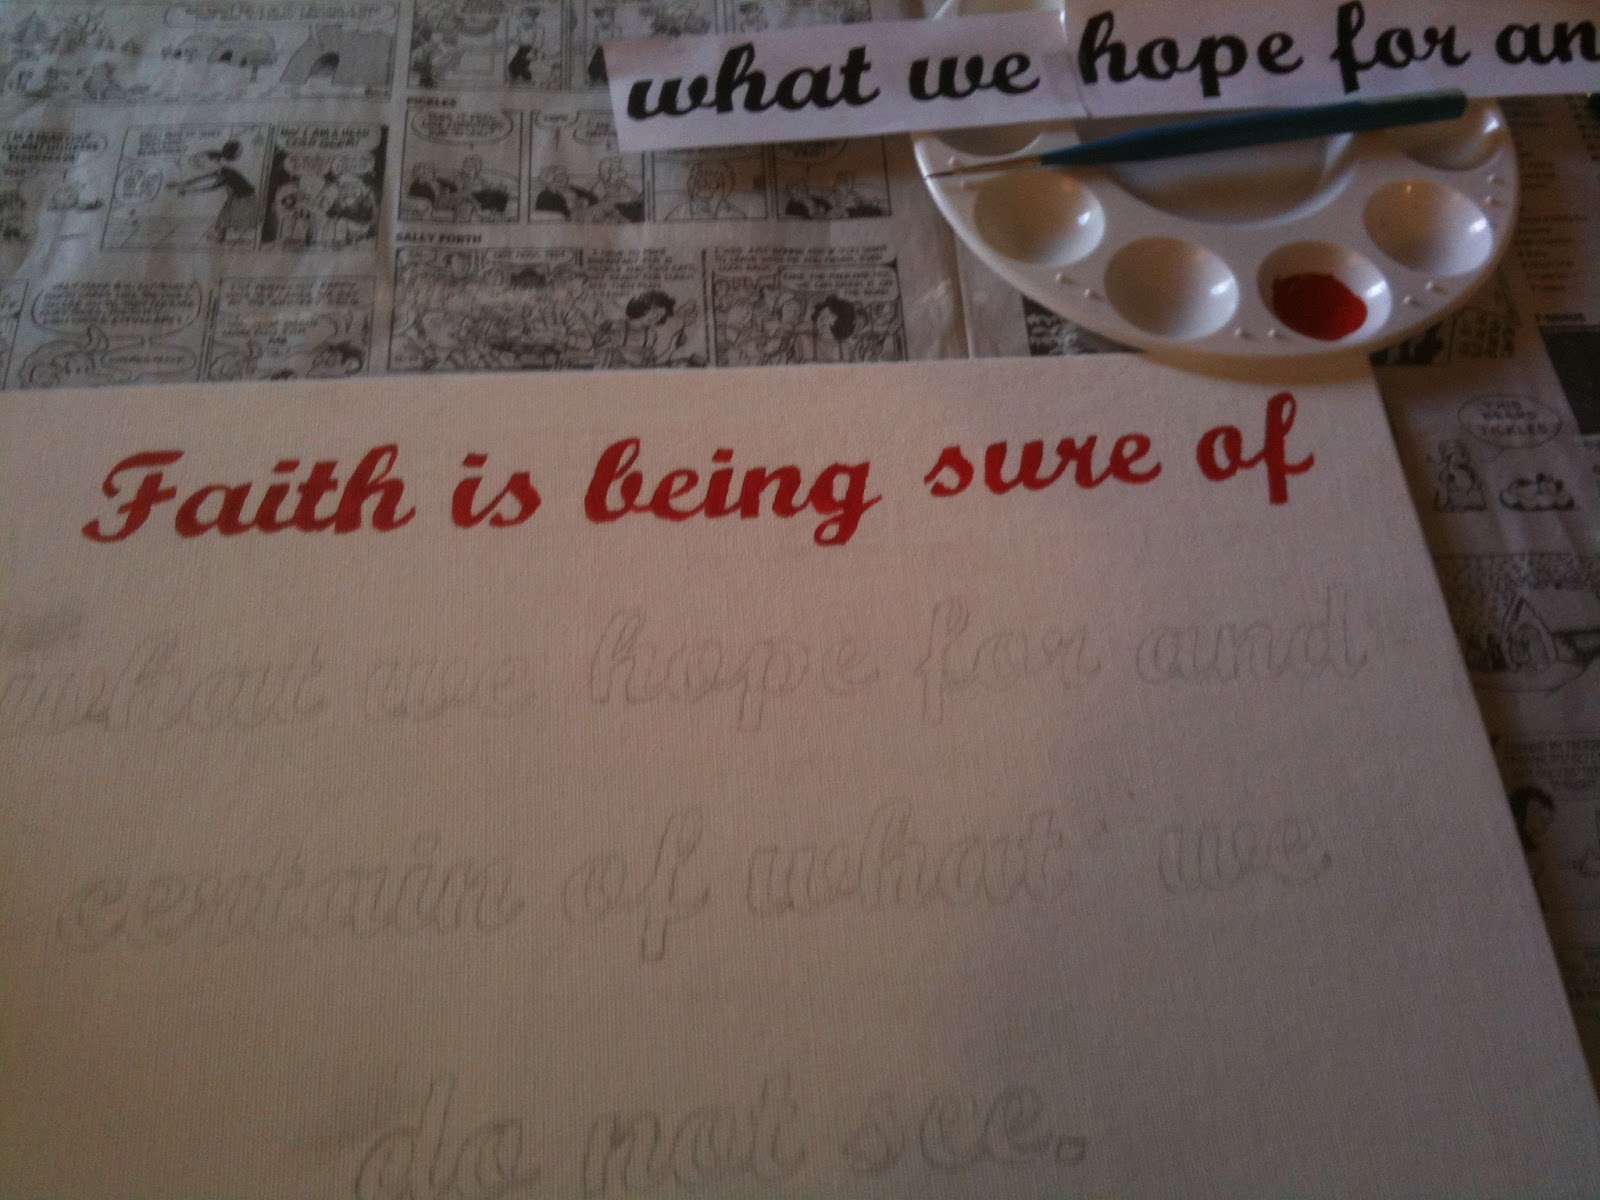
The hardest part of getting started was picking what to write on the canvas. I eventually decided to put one of my favorite scriptures on it. Hebrews 11:1 "Faith is being sure of what we hope for and certain of what we do not see." 
Then the real work began... It took some time but I managed to get it set just how I wanted it.
I rubbed the back of the paper with a pencil. I wasn't sure how much it needed so I just guessed and hoped I was right... fyi- I did it right!
Lined it up on the canvas and secured it with a small pieces of tape (so it wouldn't move as I traced).
I started to trace the words with the edge of a pen cap and it didn't work. So I reread the blog and realized she said ball point pen. That was WAY easier and worked perfectly
Finished the outline and got ready to paint. The pencil rubbing left some marks on the canvas but I figured I could fix that later.
No the best picture but I think it was after midnight when I took it on my phone
After the transfer was all done I started painting... I figured I had reached the point of no return so I might as well paint it and see what it looked like.
It took two coats of paint but I got it done and it didn't look too bad!
I cleaned up the edges with white paint and used a magic eraser to removed some of the pencil smudges. The eraser also smeared some of the red paint so I had to do some touch up work. If you don't look too closely you can't tell ;)  This is now proudly sitting on the top of the bookshelf in my living room! It's a great reminder of verse a pastor once quoted to me. I'm just waiting to see what inspired me next so I can paint the other canvas I have :)